How To Submit a Trip Delay Claim with Chase
Among the many reasons we at ToP are fans of the Chase Sapphire Preferred and Chase Sapphire Reserve is that both cards offer great travel protection. They both offer coverage for unreimbursed expenses resulting from a trip delay, such as meals and lodging, up to $500 per ticket. I always try to pay for at least a portion of my flights with my Chase Sapphire Preferred so I can have peace of mind that I'll be covered if things go awry. Thankfully, this was the case when I had an award flight on American Airlines canceled and American rebooked me on a much later flight for that same day. I submitted a claim for the expenses I incurred and received a check in the mail for the full amount in less than a month. So in this post, I'll walk through how to submit a trip delay claim with Chase based on my own experience.
Table of Contents
ToggleUnderstanding Chase's Trip Delay Benefit
The Chase Sapphire Preferred and Chase Sapphire Reserve both offer coverage for unreimbursed expenses resulting from a trip delay, such as meals and lodging, up to $500 per ticket. The benefit kicks in if the flight is delayed by at least 12 hours for the CSP (6 hours for the CSR) or requires an overnight stay. If you are ever in doubt whether an expense will be covered, we suggest reviewing your card's benefits guide.
Chase does not require you to pay for the entire flight with your credit card. Paying only a portion of the ticket is sufficient to avail yourself of the travel protection benefits on your Chase Sapphire Preferred or Chase Sapphire Reserve.
I booked my flight on American Airlines by redeeming British Airways Avios. The flight cost 9,000 Avios and $5.60 in fees. I paid the $5.60 fee with my Chase Sapphire Preferred as I always do. Because of this small $5 charge on my CSP, I was covered when I was delayed by more than 12 hours.
Background: The Delayed Flight
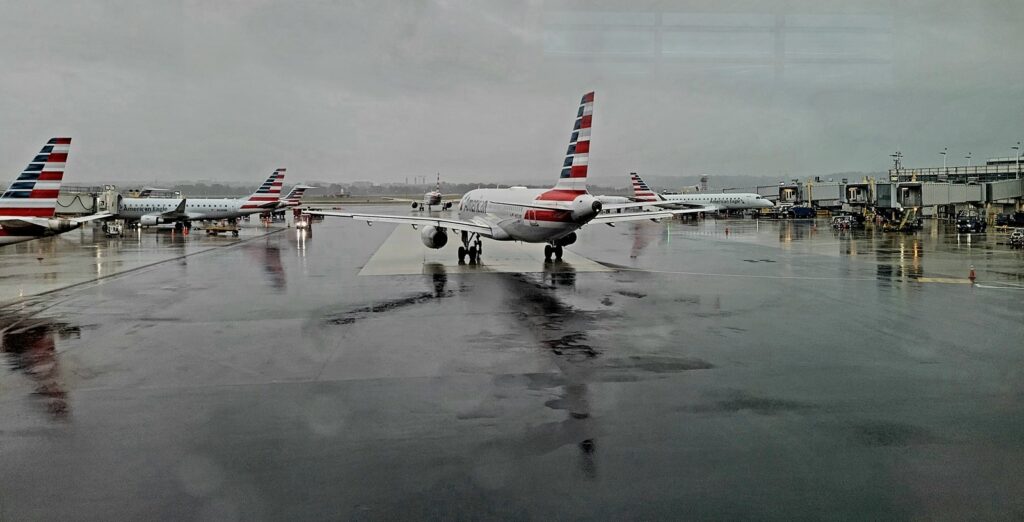
I had booked an early flight on American Airlines from Washington, DC (DCA) to Tampa (TPA) scheduled for 6:12 am. One of the benefits of taking the first flight of the morning is that you know the aircraft spent the night at your departure airport. This eliminates the risk of an earlier flight delay affecting your flight. Unfortunately, there are many other reasons why a flight could be delayed.
As soon as I went through security at DCA, I saw that the flight status changed to delayed by over an hour. I saw there was some nasty weather heading for Tampa, so that was likely the cause. Shortly thereafter, the flight was delayed by over two hours. At this point, the flight was scheduled to leave around the same time as the next scheduled flight from DCA to TPA. Unfortunately, that next flight had already been sold out for a couple of days.
After hanging out at the gate for 45 minutes or so, the gate agents announced that the flight had been canceled. I immediately sent a direct message to American Airlines on Twitter (my favorite way of communicating with American) asking to be placed on the next available flight to TPA. The best they could do was put me on a flight leaving later that evening connecting in Miami (MIA), which I accepted.
With my new flight booked, I had no reason to stay at DCA until the evening, so I went back into the city. From here on out, I knew that my expenses would likely be covered by the CSP's trip delay protection.

Expenses Incurred
The expenses I incurred due to the delay amounted to $73.75. This consisted mainly of a Lyft ride from DCA back into town and another ride back to the airport for my new evening flight. I also bought some snacks at the Miami airport since my new flight was during dinner time. I didn't need to pay for lunch at work that day, or else I would have kept that receipt for my claim as well.
How To Submit a Trip Delay Claim via Chase
The claim submission process is pretty straightforward. I'll walk through it step by step.
Step 1: Gather necessary documentation
It's best if you gather all documentation relating to your trip before starting the claim submission. At the very least, you will need:
- Your original flight ticket
- Common carrier statement (this is a statement from the airline indicating that your flight was indeed delayed, and including the reason for the delay)
- Try your best to get this from the gate agent. If they refuse, or say to do it online, push back a bit.
- Receipts for expenses incurred relating to the delay
- Settlement from any carrier or insurer (a copy of any reimbursements or settlements you received from the airline or any other insurance)
- Charge receipt (a copy of the credit card statement showing that you indeed charged the original booking to your Chase credit card)
Step 2: Go to www.eclaimsline.com and start a new claim
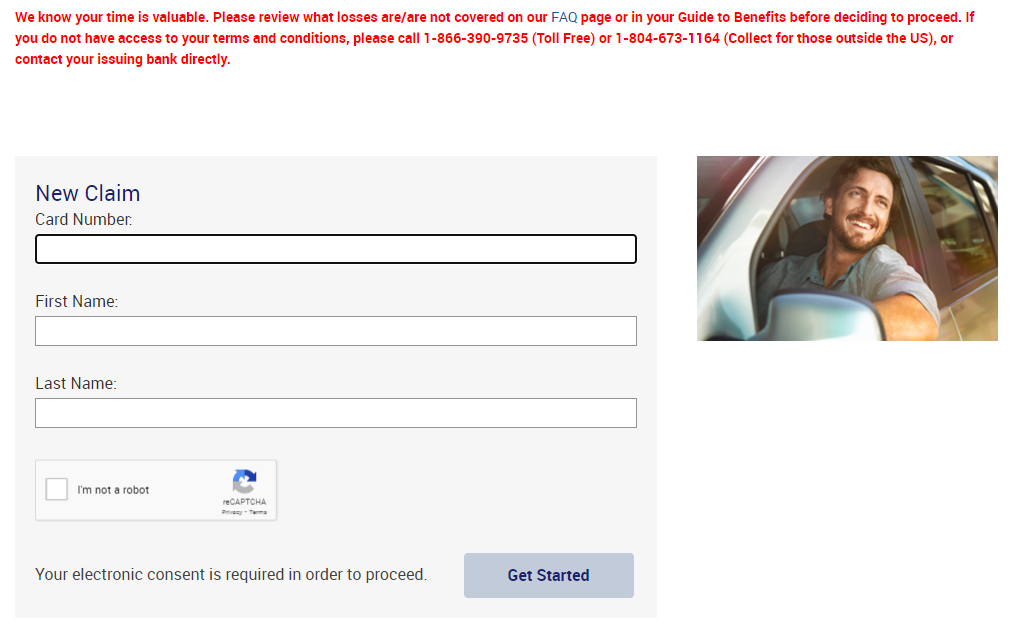
Chase travel protection claims are processed via www.eclaimsline.com. The website is simple to navigate. When starting out, click Start A Claim to begin the submission process. If you're coming back to check on an existing claim, just click on the button to the right, Find Existing Claim.
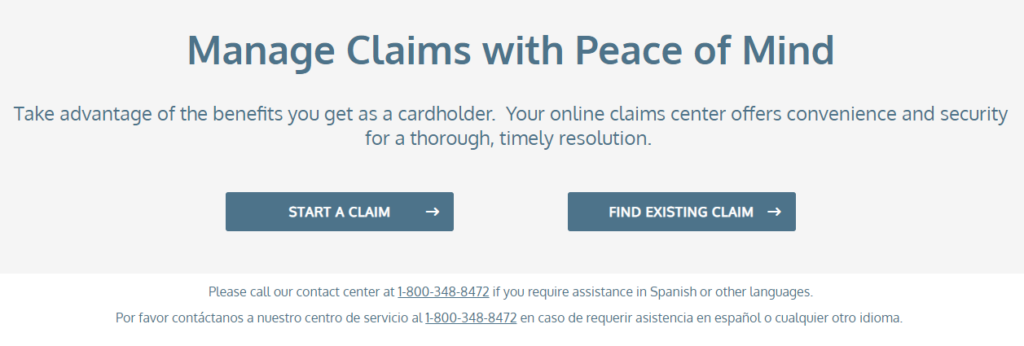
On the next page, you will be asked for your credit card number and first and last names. The credit card number you provide should be for the Chase card you used for your original booking.
Step 3: Select claim type and provide personal information
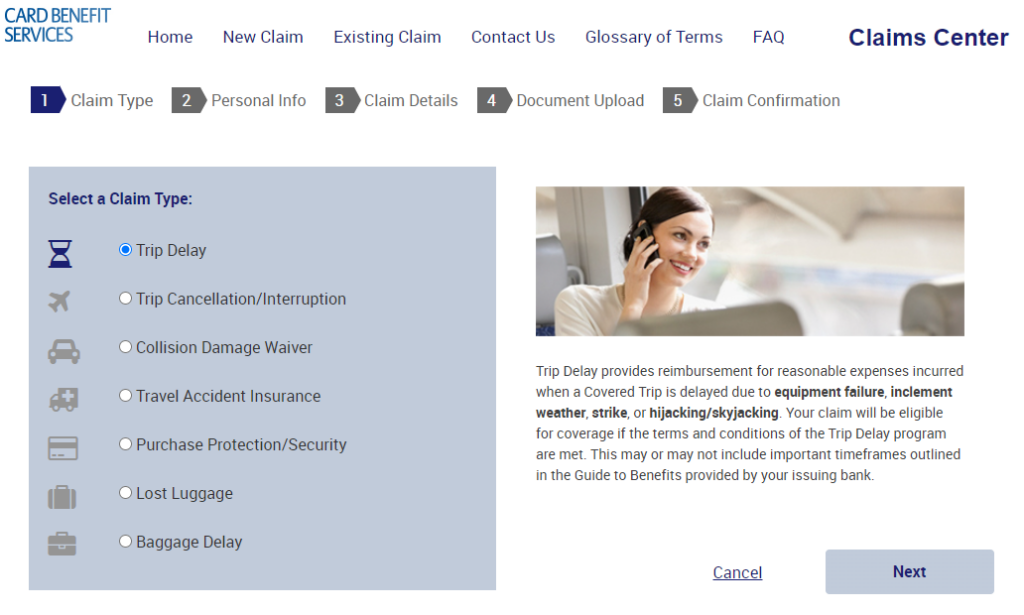
On the next page, you must select your claim type from the options listed below. Even though my flight was canceled, since American Airlines booked me on another flight that got me home, I selected Trip Delay instead of Trip Cancellation/Interruption. At the end of the day, I was only delayed.
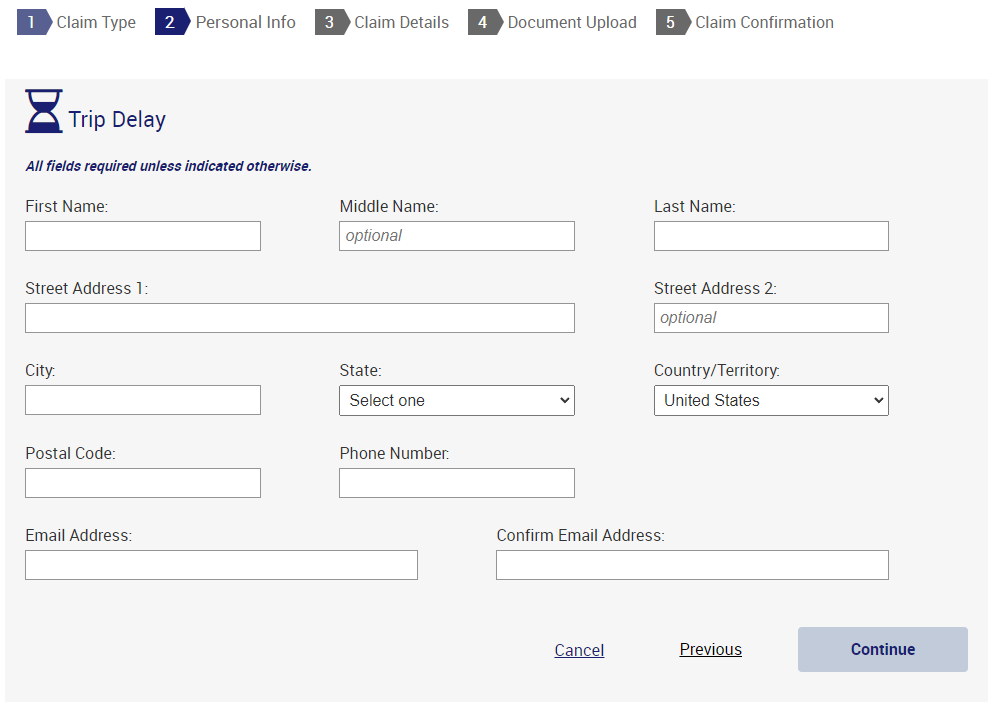
After selecting the claim type, you need to provide your personal details, followed by details about the claim. This is basic information like your full name, mailing address, and other contact information. Claim details include the reason for the delay, the amount you are requesting reimbursement for, relevant dates, and whether you received any compensation/reimbursement from the airline or any other source such as other insurance.
Step 4: Upload the required documentation
Next, you must upload the required documentation. You should have this easily accessible if you took the time to complete Step 1 above.
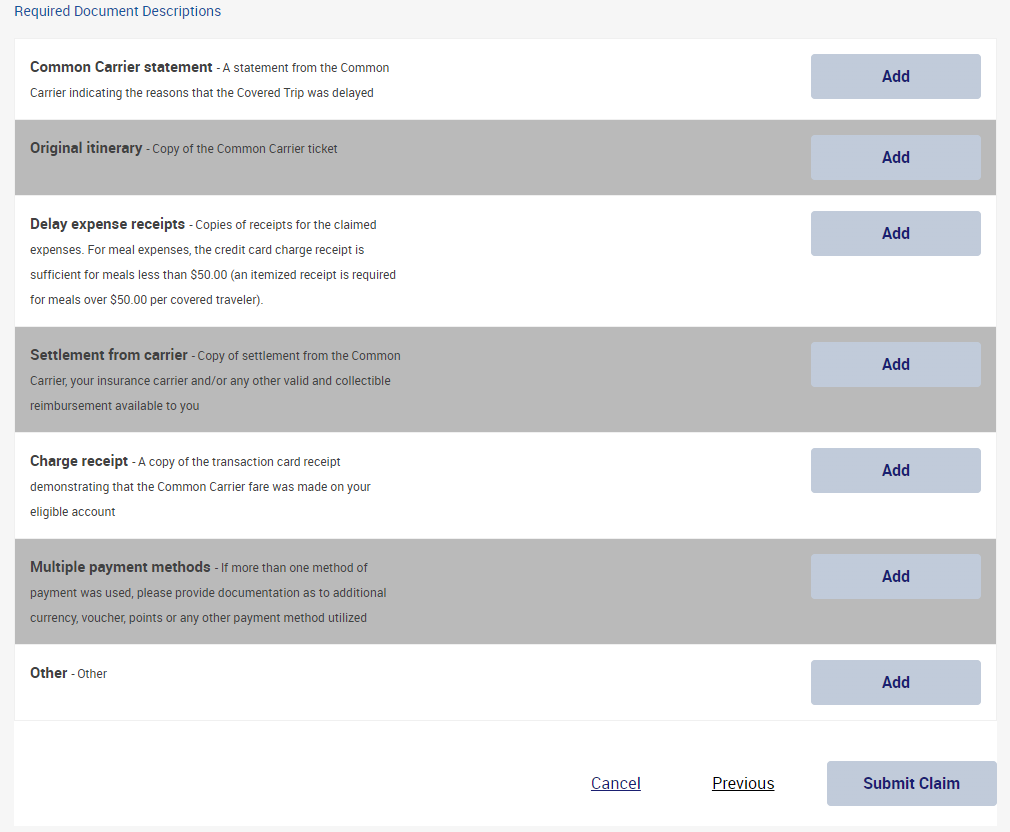
A couple of pointers here. You can obtain a common carrier statement from an airline agent at the airport or online later. I prefer the latter instead of standing in line with other stressed out passengers trying to get home. The process varies by airline, but you typically fill out a form on the airline's website and receive an email a few days later.
For the “Original itinerary” requirement, I provided an email from American Airlines reminding me to check in for my original flight. I figured this would be sufficient since the email included my record locator, departure and arrival airports and times, and the flight number.
My expenses consisted of a round-trip Lyft ride from DCA back into DC and some snacks I purchased at a convenience store during my layover in MIA. It's nice that for meals under $50, a copy of the credit card statement showing the charge is sufficient. This avoids folks having to gather too many receipts from multiple small charges. Do note the language in the screenshot above requiring an itemized receipt for meals over $50.00 per covered traveler.
You must upload any compensation or reimbursement received from other sources (the airline, other insurance, etc.). To state the obvious, we do not ever recommend lying or omitting when submitting any sort of insurance claim.
Step 5: Review and Submit
Once you have uploaded your documentation, you can review the information provided once more before submitting your claim. Make sure all the information is accurate and that all files were uploaded properly.
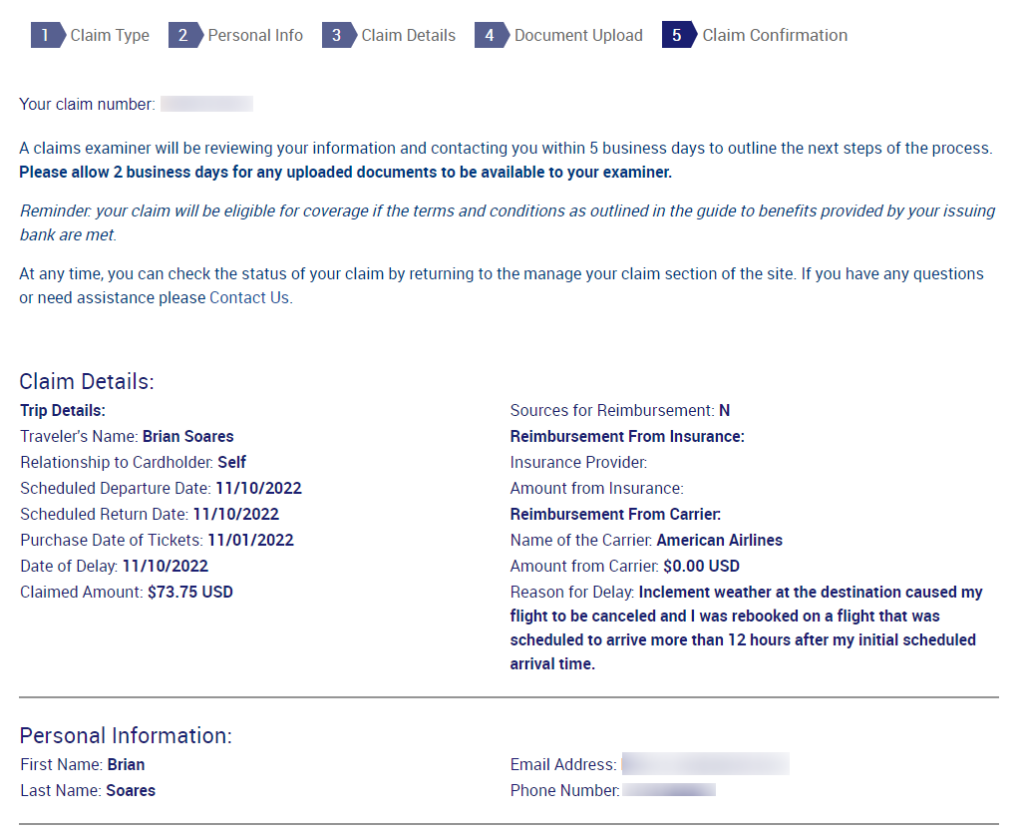
Once you submit, you will see the confirmation above, which summarizes your claim submission and includes your claim number. You will also receive a similar email confirmation.
Claim Processing
Once you submit your claim, an examiner will contact you within 5 business days describing next steps. Next steps can include requesting additional information or documentation from you.
Claim approvals are delivered via email. The email includes information on how to receive your payment. You can receive payment to a debit card account (1-2 business days), via direct deposit (3-5 business days), or through a check in the mail (7-10 business days).
How To Submit a Trip Delay Claim with Chase: ToP Thoughts
Trip protection is one of those important card benefits we hope to never use. Hopefully this walk-through demystifies the process, which is quite straightforward. The crucial part is remembering to keep records of everything. Reaching out to the airline as soon as you can is also helpful since it takes them a few days to provide you with the carrier statement.
Have you ever submitted a claim through the Chase travel insurance? Come share your experience in our Facebook Group!

